Custom Embroidered Patch | Iron-On Heart, Circle, Square
Custom Embroidered Patch | Iron-On Heart, Circle, Square
REQUIRED FIELD. Please provide your personalization details before adding to cart. Email design files or questions to angela (AT) odellmae.com
Couldn't load pickup availability
Custom embroidered patches make great gifts or marketing pieces for your band, business, club, and more!
PATCH DETAILS
• 50% pre-shrunk cotton, 50% polyester
• durable twill fabric
• resilient to heat
• 26% cotton, 74% polyester
• 3″ (7.6 cm) in diameter
MY CUSTOM ORDER PROCESS
- Select the items you want
- Add the details of your design in the personalization box.
- Place Your Order
- I begin work on your design within 2-3 business days.
- I will provide you a water-marked draft. The design work includes 2 revisions. You can purchase additional revisions upon request.
If we are unable to get to a design that you like within ~1 week of consistent communication I would issue a full refund.
HOW TO ORDER
1. CHOOSE PATCH SHAPE. SIZE, & QUANTITY: (see listing photos for examples- not sure? Message me!)
AVAILABLE SIZES
•Circular | 3″ × 3″ (inches)
•Square | 3″ × 3″ (inches)
•Heart | 3.1″ × 2.8″ (inches)
•Oval | 4″ × 2.6″ (inches)
•Rectangle | 3.5″ × 2.25″ (inches)
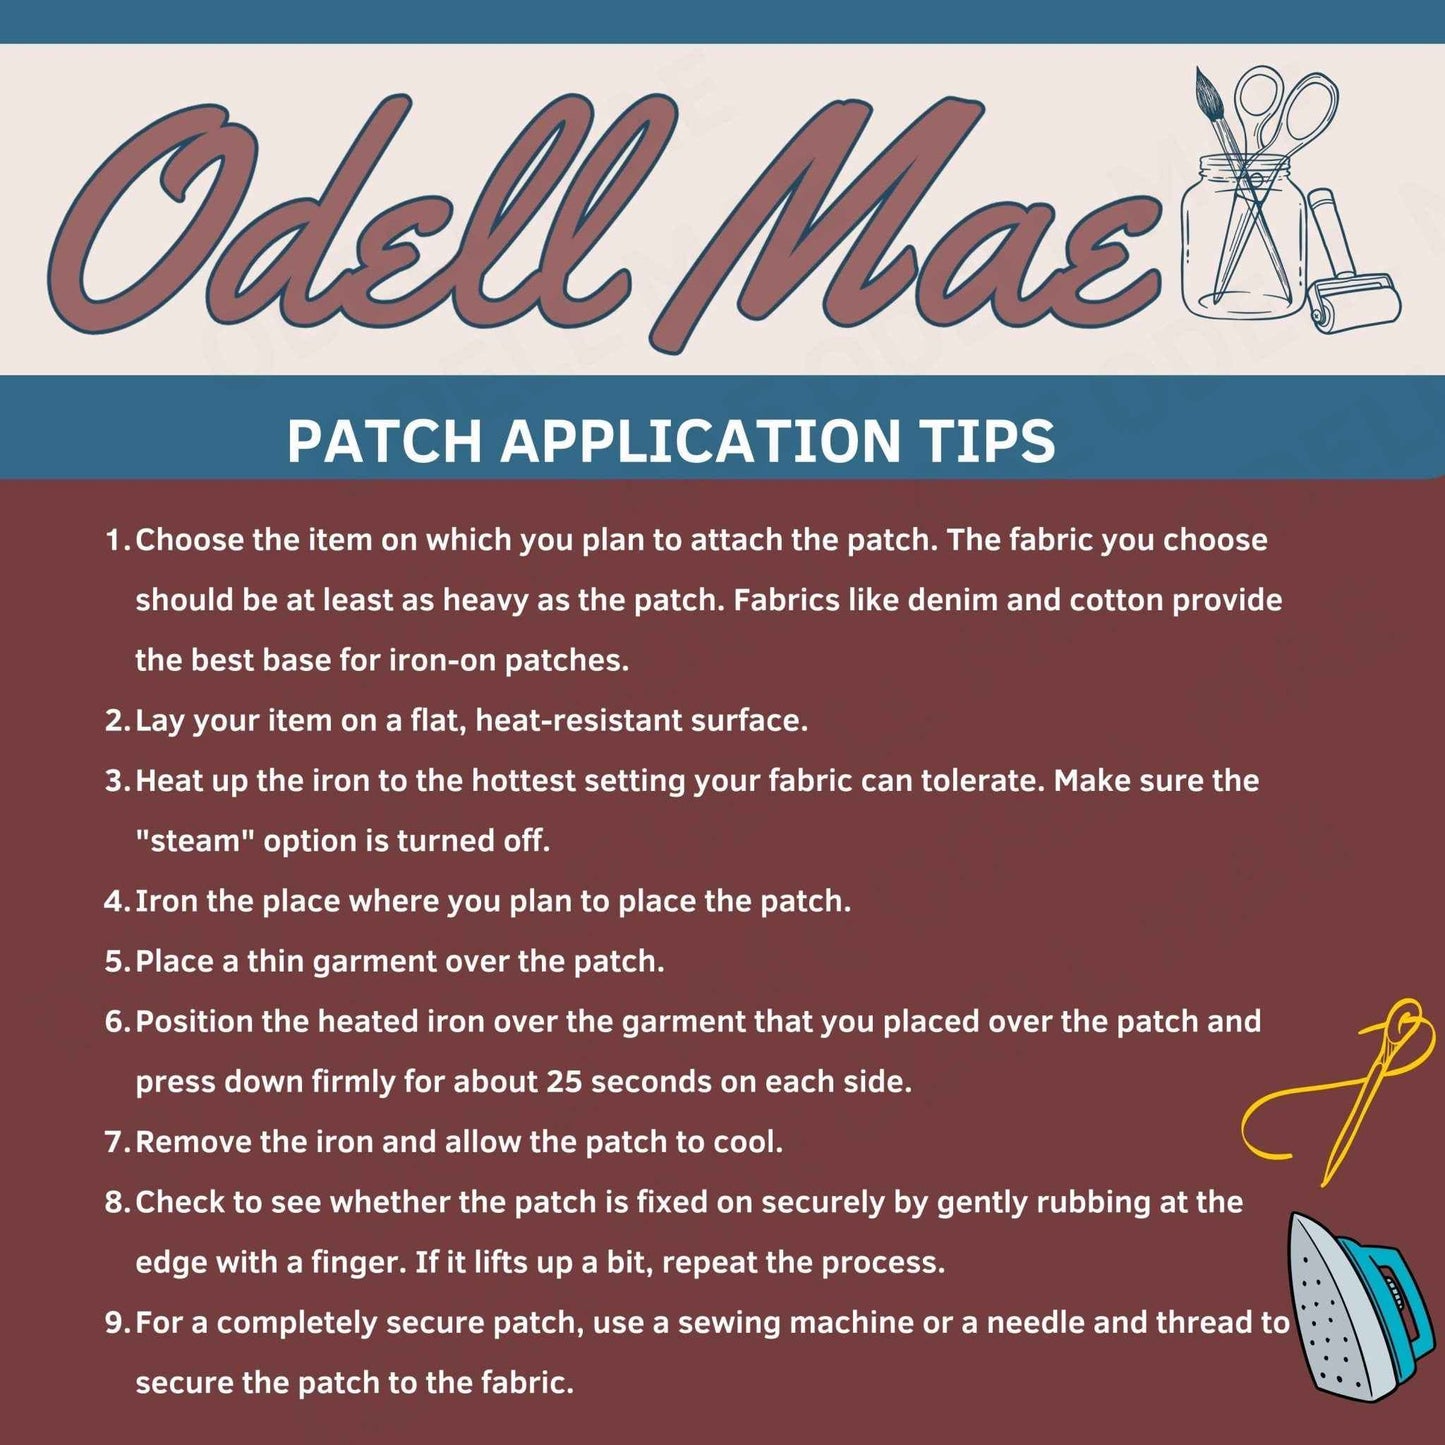
APPLICATION STEPS
Follow these steps when attaching patches by iron-on backing:
1. Choose the item on which you plan to attach the patch. The fabric you choose should be at least as heavy as the patch. Fabrics like denim and cotton provide the best base for iron-on patches.
2. Lay your item on a flat, heat-resistant surface.
3. Heat up the iron to the hottest setting your fabric can tolerate. Make sure the "steam" option is turned off.
4. Iron the place where you plan to place the patch.
5. Place a thin garment over the patch.
6. Position the heated iron over the garment that you placed over the patch and press down firmly for about 25 seconds on each side.
7. Remove the iron and allow the patch to cool.
8. Check to see whether the patch is fixed on securely by gently rubbing at the edge with a finger. If it lifts up a bit, repeat the process.
9. For a completely secure patch, use a sewing machine or a needle and thread to secure the patch to the fabric.
Important:
- No returns or exchanges for custom items, so please review the details carefully and ask any questions you have before purchasing.
- Due to the nature of embroidery, slight variations in color and fine detail may occur. I aim to preserve the heart of your design while working within the medium’s unique limitations.